"For I know that I am fearfully and wonderfully made in You...You make it Beautiful Somehow"

Wednesday, March 31, 2010

An Easter Suit For The Little Man

Last on my list of things to make before Easter...a new outfit for Jack for Easter Sunday.

I have noticed lately that you can find a TON of cute Easter outfits for little girls...but it seems like the little men of this world have been forgotten. The selection for little boy clothes always seems to be pretty minimal.

So, I decided to go ahead and make little man an outfit myself. This is my second attempt at making this suit for Jack...you can see my first attempt here...and I am so pleased with the way it turned out!


The vest and pants are made out of a pair of my hubby's dress pants that he can no longer fit into.

The vest is lined with black satin from an old robe of mine that I never used.

I just love re-purposing...don't you!!!


His entire Easter outfit cost me a total of $0!
Let's see...
Fabric for Vest and Pants- Daddy's old dress pants
Fabric to line Vest- never been used robe
Buttons for Vest- Salvaged off of Daddy's dress pants
Elastic for Waistband of Pants- already had on hand from a while ago
White button up shirt - given to us by a wonderful mommy in our church
Hat- bought at a thrift store by Jack's Hunny (Grandma)

The only thing I really need to finish off this look is a pair of dress shoes; and a tie or bow tie (which I plan to make out of fabric I already have on hand).

All in all a pretty amazing deal for an Easter outfit!

And doesn't he look handsome!


Easter Dress...Errr...Skirt


Next on my list of things to make before Easter...a dress for my self. A little while back my hubby and I had the best date ever - a trip to Hancock fabrics :-). While we were there I picked up a few patterns for things I knew I wanted to make...I normally don't care for patterns all that much but they were on sale...4 for $5...I just couldn't pass that up!

This would be my first real attempt at using an actual pattern in about ten years (my first being an Easter dress I made for myself when I was thirteen). I quickly remembered why I don't care for patterns that much. I don't know all of the technical words that are used and had to look up most of them to understand what I was supposed to do! Plus alot of the instructions were difficult to "decode".

But....I persevered and finished the dress.


I love the color of it. And the way the top fits.

However...after putting it on I am not completely thrilled with the way it all looks. It is an empire waisted dress so it kind of reminds me of the maternity clothes that I am so happy to finally be out of!

After adding a yellow ribbon to it I think it looks a little better but I am still not really excited about it.


So for now I am putting the dress aside and am going to work on it a little more later.
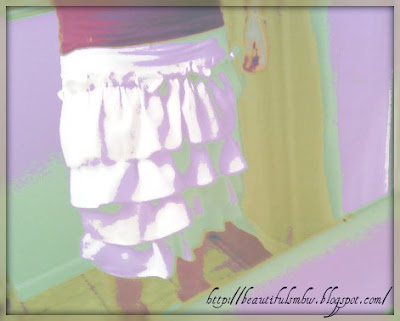
With the blue dress not being what I would call a success I was left with nothing new to wear on Sunday. Which is really not a big deal, but then the other day I stumbled up this fabulous blog. Her art (which is completely inspiring me to get back into painting mode) and tutorials are beautiful! While perusing her tutorials I fell completely head over heals in LOVE with her petticoat skirt!!

I knew immediately that I HAD TO HAVE ONE!

So I made an "emergency" trip to the fabric store to pick up some extra muslin fabric to get started right away. The fabric only cost me $6 since it was on sale at the time :-)

In her tutorial Alisa leaves all of the edges of her fabric raw...which I really do love the look of...however I decided to go ahead and hem every edge of the skirt (I was a little afraid of putting all that work into it and then it fraying to much and getting ruined). If I would have left this step out...it would have only taken me half as long. She also has an elastic waistband...but since I had an extra zipper already at home and no elastic I decided to go with the zipper.

I was really surprised at how easy the skirt was to make!

And I am ABSOLUTELY IN LOVE!

(This is my attempt to take a picture of myself in the mirror with my camera phone...lol)

Actually I love it so much that I am going to have to make one more...I am thinking of using the blue fabric from my original Easter dress :-) Maybe I will leave the edges raw with this one...I also think that I am going to assemble the skirt first and then sew on the ruffles that way it is a little more "flowy" (pretty sure that isn't a word).

If at first you don't succeed...try...try again...right?!

Monday, March 29, 2010

Gone Hunting...For Eggs!

I have been sewing up a storm lately! With Easter quickly approaching I had a few outfits in mind that I just had to make. I knew I wanted to make Jack an Easter outfit, an Easter dress for myself, and a shirt for Jack for the big Easter egg hunt on Saturday.

I decided for Jack's Easter egg hunt shirt I wanted to try a freezer paper stencil...you can find a great tutorial here on how to properly use this technique.

So my first attempt at this technique was not what I would call successful. I wasn't positive what I wanted his shirt to say or have on it...but I knew I wanted an Easter egg on the front. So I decided to paint that on first.

Now freezer paper stenciling seems like a very simple process, and in fact it was...but for whatever reason my attempt did not look good! I may have bought the wrong paint...maybe it did not dry well enough...I am not sure. What I do know is that I need to practice more!

So after the egg I decided to scrap the freezer stencil for now and went to plan B...Applique...

I love to applique!!! I find it to be very quick and easy...and love the way it looks!

...here is how Jack's Easter Egg Hunt shirt turned out...


Here is the quick rundown on how to make your own Easter Egg Gone Hunting T-shirt...
(Sorry I don't have any step-by-step pics...I got a little carried away and forgot the camera!)
You will need:
1 T-shirt any color of your choosing
1 T-shirt for the letters....or you can just use left over scraps from another project
2 different colors of ribbon (or as many colors as you choose)
1 Disappearing ink fabric pen (not sure if this is the "technical" name for it)
Scissors
Sewing Machine
(optional) Heat & Bond or Wonder Under

Next go to your computer and print off the words GONE HUNTING to use as a template.
...or you can just free hand the letters like me (I still don't have a printer). You can also print out a template for your egg at this time...or once again just free hand it.

Now you will want to cut out your template letters and egg and trace them onto your accent fabric. Or...it you don't have a fabric pen you can pin your templates onto your fabric and just cut them out that way.

The next part is optional....and is something I only do when I have a big piece of fabric that I am going to applique on since this tends to be so time consuming.

...so next you CAN... take your Heat & Bond or Wonder Under and trace and cut out each of the letters and egg and follow the directions on the packaging to attach the letters to the shirt.

...or...you can simply pin the letters to the shirt and sew around the edges like I did. A lot less time consuming!

Now for the design on the egg...I simply cut out four strips of ribbon -two white and two green. Then pinned them around the egg and sewed around the edge of the egg to keep them in place.

Finally I sewed the egg on top of my botched freezer paper stenciled egg.

I can't wait for him to wear it now!!! He is crawling all over the place so it will be interesting to see what he thinks about crawling around outside :-) a little dirt and grass is supposed to be good for little boys right?

...then again it probably won't be very good for his pants...but maybe then his grass stained pants will give me some incentive to try this Knee Pad Pants Tutorial I have been dying to try.

Later this week I will be sharing Jack's Easter Sunday Outfit...only a few more details and it will be done! :-)

Have a WONDERFUL week!

Tuesday, March 23, 2010

Editing My Spring Wardrobe...

I have been having so much fun thinking of new ways to refashion the clothes I currently have in my wardrobe.

Today I am going to share my latest, and favorite shirt refashion.

Here is what I originally had to work with...


This is a sweater I bought about a year back at Target. I really loved it...then. But looking at the way it fits now...it is just slightly too tight and the bottom hits at just exactly at the wrong spot... a spot no one would want to emphasize. But I still loved the color and the top fit just perfect.

So I took out my scissors and machine and got to work.

...and here is what I ended up with...


I decided to make a shrug :-) To begin I cut off the ribbed bottom folded it in half and sewed it back on to the shortened shirt. This helped keep the bottom from being too loose and gives it a little more stretch.

The buttons on the front actually came from the side of the shirt...a weird place to have buttons. So I just cut off the fabric strip and sewed it on the front. This saved me a ton of time since I didn't have to sew new button holes! (...and I abhor sewing button holes!!!!)

Next I shorted the sleeves and re-attached the ribbed bottom portion to the sleeve so that it gave it a little puff.

At this point I was starting to feel much better about the shirt, but it still didn't feel finished. So I attached four doilies to the top to give it a little more visual interest. (I got a full bag of these fabulous babies in one of the three boxes of fabric my mom gave me the last time I visited her!)
I simply pinned them on where I wanted them and stitched them on with my machine.

I am so pleased with how it turned out!

Jack's St. Patty's Day Shirt


I have been loving making clothes for my little man! Well St. Patrick's Day rolled around and I decided to whip up this cute little shirt for my little cutie so he could avoid being pinched.

However, he has those adorable chubby little cheeks that you just want to squeeze any way!

I picked out this fabric for him because, I hate to make something that he is only going to wear one time...seams like a waste of my time. Plus, this fabric was just too cute (and on sale!) to pass up in the store :-) ...those are monster trucks on his shirt...in case you were wondering.

I made this fun shirt using MADE's 90 min T-Shirt tutorial, yet again. You can see the others I made for him here.

These shirts are so easy to make...that is all except for the part where I have to attach the sleeves. I'm not sure if I just don't have the pattern right or what...but I have resorted to stitching the sleeves on with a running stitch first. This allows for me to take it apart with my seam ripper much easier!

Of course, I then get the sleeves even and sewed on just the way I want...and I realize that I have sewed them on inside out...when it is 1 a.m. all you can do at that point is take a deep breath grab that seam ripper and get back to work. Otherwise I might be tempted scream...and that would leave me with one crying baby and one unhappy hubby...and I am pretty sure the neighbors wouldn't appreciate it much either!

One thing sewing has definitely taught me...PATIENCE!

Another new challenge for me was working with ribbing for the very first time. That stuff is NOT easy to work with! I am sure there is some trick to working with it...but I guess for now I will just have to keep practicing. Good thing my motto is "Completion not Perfection"!!

Hopefully, in this case practice will make perfect, because I still love to make these shirts...until then I will keep practicing my patience as well :-)

So here he is once again in his new adorable shirt...


...being his adorable self...

Don't you just want to pinch those chubby cheeks!!!!

Monday, March 22, 2010

It Is Never Too Early To Start Learning...

My son Jack is only eight months old...actually I say only but I can't believe he is already eight months old!!!!! Time is going by so fast! He is already crawling, pulling up on the furniture, attempting to "cruise" around while holding on to the furniture, has his first tooth, and can say Mama, Dada, and Baba!

I love each and every stage! Every milestone he accomplishes is so precious. One of the best things is to watch Jack accomplish something new...and to see the look of pride on his face! It is so cute that he just knows he did something great.

It also makes me and my husband so proud when we are the ones who teach him how to do something new. Like how to put his ball in the top of the castle so that it rolls down and comes out the bottom. It only took him one or two times of watching us do it to steal the ball out of our hands and try it for himself :-)

I am very much a pro-homeschooling person...I'm sure this has a lot to do with the fact that I was homeschooled through out most of my jr. high and high school years. Now, don't get me wrong, I think the public school system can be good, even great. I am actually almost done with my elementary education degree so that someday I can be a public school teacher. However, for my own children I am leaning toward homeschooling them. This is an issue my husband and I are still praying about.

With that in mind I want to start working with Jack to prepare him for preschool, kindergarten, and beyond. (Of course I would do this regardless if he would be homeschooled or attend public school) Now with Jack only being eight months old it is very hard to find any kind of book or curriculum that gives lessons that you can do with a baby or even a very young toddler. Most of the books out there would be way beyond his ability to perform or even comprehend.

Tonight I am extremely excited to say that I have finally found a book that I can use to start teaching Jack NOW :-)

The book is Slow And Steady GET ME READY by June R. Oberlander. This book is WONDERFUL! It has 260 weekly lessons that are for birth-5 years old!
I had heard of this book mentioned on another mommy's blog, and had seen it when I was working at Mardel. So after hubby and I sold a ton of our movies this past weekend I finally decided to go buy it.

And I am so so so glad I did!! I cannot wait to start doing each of the activities with Jack starting first thing tomorrow.
Whether you are planning to homeschool, or send your child to private or public school it is so important that we help our children discover a love for learning. To help them discover what their strong points are, and to help them in their weakness. Plus, we as parents get the bonus of that wonderful feeling of pride and joy we get from teaching our children how to do something. Like I said before...I love that feeling!

So tonight I will leave you with this last image of total cuteness!!!

Sunday, March 21, 2010

Time For A LITTLE Girly Moment

There are so many adorable ideas out there for craft and sewing projects for little girls! However, since I don't have a little girl of my own there wouldn't be any point in trying them out right now.

But since these projects I have been seeing lately are so stinkin adorable and I don't want to just wait till I have a little girl of my own...

I have decided to start trying them any way...and give them to my wonderful girl friends who do have little girls. Remember the summer dress and the little blue dress...proof that I just can't wait any more!

So when my good friend's little girl Zoe turned 1 I jumped at the chance to make something a little more girly!

I have been very much in a quiet book making mood that I decided to make a more girly version of it for Zoe. :-)

So here it is...Zoe's Quiet Book...done the girly way...


PAGE ONE...
...lift up the flowers to see..

Mommy, Daddy, and Zoe looking at me!

PAGE TWO...
....lets fly...

...up...up...up...to the the pretty sunflower!

PAGE THREE...
....hello again to our barnyard friends!

PAGE FOUR...

...pick the apples one by one and count them as you put them in the basket. Do you have enough to make a bushel??

PAGE FIVE...
... untie the ribbon to revel...

Clothes! Time to play dress up :-)

When you are done put your clothes away and practice tying the ribbon!
PAGE SIX...
....Do you know how to spell your name?


That's right...Z...O...E! Button the letters on as you say each of their names :-)

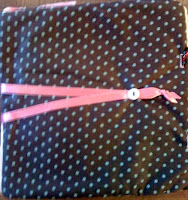
FRONT AND BACK...


Once again I got a ton of ideas and inspiration for this quiet book from Homemade By Jill's blog...here and here is where you can get some more ideas from her...plus templates!

It was so fun to get into the girly groove for a little bit...now back to thinking up some new pages for my little man's book :-)

The pages and covers are made of cotton fabric and all of the details are made out of felt. Plus a couple of buttons, velcro, and ribbon. For the photos on the flowers I simply printed them out on my computer, cut them to fit, and modge podged them on to the felt. I am hoping they hold up okay. If I do something with pictures or paper again I think I am going to laminate them and hot glue them down.

Have fun creating your own girly version of a quiet book!!
Related Posts Plugin for WordPress, Blogger...