"For I know that I am fearfully and wonderfully made in You...You make it Beautiful Somehow"
Showing posts with label Imaginative Play. Show all posts

Tuesday, April 3, 2012

Our Playhouse


Welcome to our playhouse! Come on in and have some fun! 


I first saw the idea for an over the table play house on Homemade by Jill. She made an amazing playhouse for her son's birthday. I was completely in love with the idea! It took me quite a while to get around to doing the project, but once I started I had so much fun making it!

Would you like a tour? 

Above is our front door. Simply flip the door up and come on in! This makes it easy for little ones to crawl in and out. A reader on Homemade by Jill suggested adding velcro Christmas lights during December. I will definitely be doing this!

At the window box you can pick pretty flowers. They even smell! I simply spayed them with some flowery scented body spray. The smell has started to wear off, so I may add some dried lavender or something to the inside. Jack loves smelling them!


 We have our own mail box and even an Itsy Bitsy Spider!


Jack loves to deliver the mail! He will do it over and over again for thirty minutes, and still not be bored. Funny how something so simple can bring so much fun! I made up small post cards for him to deliver. They say...

Jack,
I love you.
Love Mommy

Jack,
I am proud of you.
Love Daddy

They even have a heart postage stamp.


The Itsy Bitsy spider is a huge favorite! This was the last thing I added to the house before assembling it. Jack loves to sing. Currently his favorite song is the Itsy Bitsy spider. I thought it only fitting to add one to his house. The little spider slides up and down a string and can even hide inside the bottom of the spout! Of course, he always sings the song when he plays with his spider. I love this little guy!


Time to go fishing! Our little pond is complete with cattails and rainbow fish. In the future I plan to add some velcro fireflies to the top that Jack can move around.


 It took a bit of thinking to figure out how I wanted to do the fishing rod and fish. I wanted Jack to actually be able to catch the fish on his line. I originally thought of metal sewed into the fish and a magnet on the end of the fishing line. Luke however, is still in the 'put everything, everywhere, in my mouth' stage. I was afraid he would pull the magnet off the line and choke or ingest it. Not good. 
Instead, I made the fish out of felt and stuffed them, added some velcro to the end of the fishing line and presto...time to fish! 

It is not the easiest method, since the velcro also grabs the sides of the pond. The really positive thing about it, is the concentration it takes to actually catch a fish. It also really helps with hand-eye coordination skills!


 This is our apple tree. You can pick the apples! Other blogs suggest making different kinds of fruit so you can switch it out periodically. I would love to add some lemons!


 Around the back we have a large garden. I got this whole idea from Homemade by Jill and from Miss Pretty Pretty on etsy. (Her houses on etsy are AMAZING!)

You can harvest all of the vegetables! We have corn, carrots, potatoes, tomatoes, lettuce, and a giant pumpkin. During Halloween, I am going to make some felt shapes the kids can add to the pumpkin to make a jack-o-lantern!


 After a long day of harvesting it is time to cook up all that good food!


 Time for a camp out! Build a fire, roast some marshmallows, and stare up at the stars!


 Each of the stars is attached with velco so Jack can move them around! There is also a stick with marshmallows (didn't make it into the picture somehow) to roast over the campfire!


Oh, and it is also a secret entrance into our playhouse! It zips up and down, which is great practice for little fingers! 


Come on inside and take a look! I wanted every inch of our play house to be interactive, encourage imaginative play, and be used as a teaching tool. Because of this I even add things to the walls inside!

First is our ABC "chalkboard" wall. Each letter is made of two pieces of felt that are sewn together to make them sturdier. Take them out of the storage pocket and arrange them on the chalkboard. Five strips of velcro help hold the letters in place. As Jack gets older I will add more letters so we can begin to spell out words.


Our clock was "created" by Jack. When I started making this clock is was a plain circle with numbers and hands. When Jack saw it he said "oh momma, tickety tock!" He was of course referring to Tickety Tock off of Blue Clues. Awesome idea Jack! I added a few more details and we now have our own Tickety Tock. The hands are attached with a button so they can be moved to practice telling time.


I added a tic tac toe game. Jack doesn't completely get how you play the game, but he is learning!


We can even practice counting on our abacus. The beads slide easily across the ribbon to count them one by one. We also use this to practice some of our colors. 


Child learn through play. That was one of my big motivations for making this house. I wanted something that would encourage my children's imagination and help them learn in the process.
We play for hours in our playhouse. The options are almost endless! It is the perfect thing for a rainy or cold day when you can't be outside.

This project was so much fun to make! I loved coming up with ideas for it. Making it was actually easier than I thought it would be. It took me about two weeks to come up with the ideas, cut it all out, and sew it all together. I made ours to fit perfectly over our kitchen table. I loved this idea since it wouldn't take up any extra space to set up a card table or make a frame for it. However, if you have some extra space to keep it set up all the time, a card table or a pvc frame would be perfect.

A few things to remember when making your own...

-Sew on all of the details first. Then assemble. It was hard enough to maneuver one big piece of felt on my sewing machine, I can't imagine how hard it would be with all the side intact already!

-Use felt for the base and details. It is easy to cut out, sew, and you don't have to finish any of the edges. 

-Make plans for at least two windows. Otherwise it becomes pretty stuffy and dark in there! Two windows will allow for airflow and light...much more pleasant.

-Consider putting some type of mesh on the windows. Little ones will try to crawl or jump through the windows. Homemade by Jill warned me of this but I didn't listen. Wishing now I would have done this!

-Shop around for your supplies. One of the reasons I put off doing this project for so long, was the amount of material the base requires. Use coupons and shop around for the best sale price. I waited and found a ton of the blue and red felt at the thrift store for only a few dollars!!!!! What a steal!


Here are some additional resources with tips on making your own Playhouse!

-Homemade by Jill has several posts on her playhouse, and even templates! Find them here.

-Sew Much Ado has a fun and easy tutorial on their boy's playhouse. Find it here.

-I love this sweet little playhouse from Nap Time Crafters! Perfect for little girls! I love the inside...especially the book shelf idea! Actually, I love it all!

-Sew Like My Mom made a playhouse to go over a pvc frame! Find it here.

-You can also find tons of inspiration on this card table playhouse Pinterest board.

-Of course if the idea of making one of your own is out of the question you can buy them from Miss Pretty Pretty on Etsy! Her playhouses are gorgeous and she has tons of themes to choose from! Find her shop here!




Saturday, April 24, 2010

Learning Our Colors


So I am sure it is pretty obvious by now that I LOVE making fabric books! I would almost say that I love making them more than Jack enjoys playing with them (well eating right now- he is teething after all!)

I love the idea of children playing and learning all at the same time. And I truly believe that it is never too early for a child to start learning!

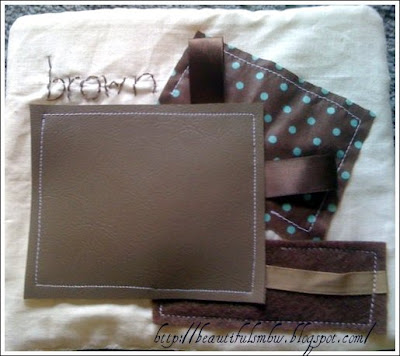
So I decided to make him a book to help him learn his colors (hopefully he isn't color blind like his daddy). I also wanted him to be able to learn concepts like shades of colors, pattern, texture, and shapes with this book. Each page is devoted to a different color. I used different patterned cotton fabrics, felt, ribbon, silk, ruffles, fake leather, stuffed shapes, and some fuzzy fabric.

So here it is...Jack's COLORS book...


If you would like to make a fabric "Quiet" book here are a few blogs you should definitely check out....

How to Make a Quiet Book

Homemade By Jill

and Hippos and Dinosaurs has an adorable ABC quiet book...that I definitely see myself having to make in the near future!


And He Played With The Box!

Parents go through a lot of trouble to pick out just the perfect present for their little one. The perfect birthday present...the perfect Christmas present. You look and look and look until you find it...the PERFECT present...sure to thrill your precious child!

You wrap it up all fancy in special wrapping paper with a big bow, then excitedly present it to your child to open. You watch as your child squeals in delight, they tear apart that fancy wrapping paper and utterly destroy the bow you so carefully tied. They finally get to the toy...they jump up and down in delight...squealing even louder now. The exact reaction that you had been waiting for. They tear open the box the toy came in...play with the toy for about a minute..

then toss it aside and play with the box it came in instead...for hours!

it never seems to fail....babies and kids alike are so fascinated with the most simple of things.

And my son is no exception!


He spotted this box in his bedroom the other day and immediately was drawn to it...he played with it, on it, and in it for a good hour and a half!

I really do love that he wanted to play with it though...I think things like this are great to help develop a child's imagination.

I finally put him inside of it and began pushing him around the living room in it like it was a race car....and...

HE LOVED IT!

he was squealing and laughing like crazy...and when I would stop he would do this cute little grunt as if to say 'do it again mommy!'

So I started thinking...how cute it would be to actually make it into a race car for Jack. -now I am sure that at nine months Jack probably doesn't care if it actually looks like a car...just as long as I still push him around in it...but I just couldn't resist!


So I decided to make a slip cover to go over the box that would resemble a race car....


The front of the car has a bumper... and big head lights...

and the sides have tires and racing stripes :-)


Vroom Vroom! Go Jack!


I decided to add a pocket on the inside of the car to hold Jack's toys...after all you can't go driving with out your dinosaur buddy by your side!


I am still planning on adding a steering wheel to the inside so he can pretend to drive the car. I also may eventually take the bottom out (when he gets too big to sit in it) and add straps to go over his shoulders so he can stand up and pretend to race the car :-)

So go grab a box and let your little one's imagination go wild!


Sunday, March 21, 2010

Time For A LITTLE Girly Moment

There are so many adorable ideas out there for craft and sewing projects for little girls! However, since I don't have a little girl of my own there wouldn't be any point in trying them out right now.

But since these projects I have been seeing lately are so stinkin adorable and I don't want to just wait till I have a little girl of my own...

I have decided to start trying them any way...and give them to my wonderful girl friends who do have little girls. Remember the summer dress and the little blue dress...proof that I just can't wait any more!

So when my good friend's little girl Zoe turned 1 I jumped at the chance to make something a little more girly!

I have been very much in a quiet book making mood that I decided to make a more girly version of it for Zoe. :-)

So here it is...Zoe's Quiet Book...done the girly way...


PAGE ONE...
...lift up the flowers to see..

Mommy, Daddy, and Zoe looking at me!

PAGE TWO...
....lets fly...

...up...up...up...to the the pretty sunflower!

PAGE THREE...
....hello again to our barnyard friends!

PAGE FOUR...

...pick the apples one by one and count them as you put them in the basket. Do you have enough to make a bushel??

PAGE FIVE...
... untie the ribbon to revel...

Clothes! Time to play dress up :-)

When you are done put your clothes away and practice tying the ribbon!
PAGE SIX...
....Do you know how to spell your name?


That's right...Z...O...E! Button the letters on as you say each of their names :-)

FRONT AND BACK...


Once again I got a ton of ideas and inspiration for this quiet book from Homemade By Jill's blog...here and here is where you can get some more ideas from her...plus templates!

It was so fun to get into the girly groove for a little bit...now back to thinking up some new pages for my little man's book :-)

The pages and covers are made of cotton fabric and all of the details are made out of felt. Plus a couple of buttons, velcro, and ribbon. For the photos on the flowers I simply printed them out on my computer, cut them to fit, and modge podged them on to the felt. I am hoping they hold up okay. If I do something with pictures or paper again I think I am going to laminate them and hot glue them down.

Have fun creating your own girly version of a quiet book!!

Monday, March 15, 2010

FINALLY FINISHED...THE QUIET BOOK

I finally finished Jack's quiet book! Yeah!!!
I loved putting this book together. I was pleasantly surprised that I also LOVED all of the hand sewing parts of it.

The pages are made of cotton and all of the little details are made of felt. I also used book rings to hold it all together so I can add more pages later.

Most of the concepts in the book are a little...okay a lot over Jack's level...but I just couldn't wait that long to make this for him! Besides...he still loves the book...mostly to chew on it - he is teething after all...what else would you expect him to do with it ;-)

If you want some more ideas for quiet book pages and even templates for some of the pages go to Homemade by Jill's blog. Her blog is amazing!!! Tons of ideas and inspiration! and definitely where I got the inspiration and ideas for Jack's quiet book :-)

So here it is for your viewing pleasure...

PAGES ONE AND TWO...


Is that a little red bird up in that tree? He wants to say good morning Jack!


Lift up each ray of sunshine to discover a surprise...time to learn our shapes and colors!

Oh...and don't forget Jack Jack...
YOU ARE MY SUNSHINE!


PAGES THREE AND FOUR...


What is that hiding being those barn doors???

...it is our friends the cow, chicken, and pig!

Time to put on a puppet show :-)

What sound does the cow make??? MOO!!!
What sound does the chicken make??? CLUCK!!!
What sound does the piggy make??? OINK!!!

...now it's time to feed our barnyard friends...

Lets go to the garden and pick some veggies...

You can pick corn right off the stalk, carrots right out of the ground, and lettuce leaves.

Oh and don't forget to say hello to that cute little red bird again!

PAGES FIVE AND SIX...


count it down...3...2...1...

BLAST OFF!
Fly all the way to the moon and back...and practicing counting forward and backward while you do it :-)

Time to play with fishies...

Play peek a boo with some friendly goldfish and a playful turtle. Move them around in the fish bowl...

All of the fish, the turtle, and the numbers are attached with velcro. Go ahead...move them around where ever you want :-)

PAGES SEVEN AND EIGHT...


Okay buddy...daddy needs help fixing up the house...

Get out your tools!

With a hammer, screw driver, and saw my little man can fix just about anything ;-)

Time to check the mail box....

You've Got Mail!!!

Can you read your mail to mommy?

and look...it is little red bird's friend...blue bird :-)

FRONT AND BACK COVER...

Quiet book front cover...kept it simple for now.

Back cover has a pocket to hold any little extras I decide to make for the book -extra puppets, numbers and fishies for the fish bowl, tools for the tool box, and letters for the mail box!

I am really excited to start thinking of more of my own original ideas for pages to add to this book and maybe even make another one!

Coming soon....a girly version of the quiet book...stay tuned!!
Related Posts Plugin for WordPress, Blogger...