"For I know that I am fearfully and wonderfully made in You...You make it Beautiful Somehow"
Showing posts with label spring wardrobe. Show all posts

Wednesday, May 12, 2010

FOREVER 21

April 27th was my little sister's 21st birthday!


Isn't she beautiful?!?!


She put in a special request for me to make her something for a present instead of buying something. She mentioned that she loved my purple shrug and wanted something refashioned like it. So I dug through my closet and ended up with...

...this skirt and this dress...


I bought the dress from a thrift store (originally from Forever 21) for $2 about a month ago...I though it was adorable so I went ahead and bought it even though the top was a bit too small on me.

I bought the skirt from Target...on clearance about a year ago for $3...I loved the skirt but decided to go ahead and part with it since it was going toward a worthy cause.

So I began cutting and sewing and piecing together...

...and here is what I came up with...


I cut the bottom off of the skirt and attached it to the bottom of the dress. Then added some trim to the top of the pockets. I replaced the plain yellow ties at the top with fabric from the skirt. Finally I cut out the bust and two side panels and replaced them with skirt fabric. I made the two side panels a little large so that it widened the top of the dress...too tight top...problem solved!

I was really excited that she was going to be visiting me (along with our 3 other sisters) for mother's day so I would be able to give her the dress in person.
And to my delight it fit her perfectly!!! Yeah!!!

Happy 21st Birthday Erica!!! I love you so much and am so extremely proud of you and excited about what God has in store for your future!



Wednesday, March 31, 2010

Easter Dress...Errr...Skirt


Next on my list of things to make before Easter...a dress for my self. A little while back my hubby and I had the best date ever - a trip to Hancock fabrics :-). While we were there I picked up a few patterns for things I knew I wanted to make...I normally don't care for patterns all that much but they were on sale...4 for $5...I just couldn't pass that up!

This would be my first real attempt at using an actual pattern in about ten years (my first being an Easter dress I made for myself when I was thirteen). I quickly remembered why I don't care for patterns that much. I don't know all of the technical words that are used and had to look up most of them to understand what I was supposed to do! Plus alot of the instructions were difficult to "decode".

But....I persevered and finished the dress.


I love the color of it. And the way the top fits.

However...after putting it on I am not completely thrilled with the way it all looks. It is an empire waisted dress so it kind of reminds me of the maternity clothes that I am so happy to finally be out of!

After adding a yellow ribbon to it I think it looks a little better but I am still not really excited about it.


So for now I am putting the dress aside and am going to work on it a little more later.
With the blue dress not being what I would call a success I was left with nothing new to wear on Sunday. Which is really not a big deal, but then the other day I stumbled up this fabulous blog. Her art (which is completely inspiring me to get back into painting mode) and tutorials are beautiful! While perusing her tutorials I fell completely head over heals in LOVE with her petticoat skirt!!

I knew immediately that I HAD TO HAVE ONE!

So I made an "emergency" trip to the fabric store to pick up some extra muslin fabric to get started right away. The fabric only cost me $6 since it was on sale at the time :-)

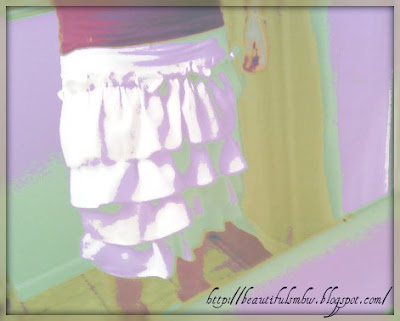
In her tutorial Alisa leaves all of the edges of her fabric raw...which I really do love the look of...however I decided to go ahead and hem every edge of the skirt (I was a little afraid of putting all that work into it and then it fraying to much and getting ruined). If I would have left this step out...it would have only taken me half as long. She also has an elastic waistband...but since I had an extra zipper already at home and no elastic I decided to go with the zipper.

I was really surprised at how easy the skirt was to make!

And I am ABSOLUTELY IN LOVE!

(This is my attempt to take a picture of myself in the mirror with my camera phone...lol)

Actually I love it so much that I am going to have to make one more...I am thinking of using the blue fabric from my original Easter dress :-) Maybe I will leave the edges raw with this one...I also think that I am going to assemble the skirt first and then sew on the ruffles that way it is a little more "flowy" (pretty sure that isn't a word).

If at first you don't succeed...try...try again...right?!

Tuesday, March 23, 2010

Editing My Spring Wardrobe...

I have been having so much fun thinking of new ways to refashion the clothes I currently have in my wardrobe.

Today I am going to share my latest, and favorite shirt refashion.

Here is what I originally had to work with...


This is a sweater I bought about a year back at Target. I really loved it...then. But looking at the way it fits now...it is just slightly too tight and the bottom hits at just exactly at the wrong spot... a spot no one would want to emphasize. But I still loved the color and the top fit just perfect.

So I took out my scissors and machine and got to work.

...and here is what I ended up with...


I decided to make a shrug :-) To begin I cut off the ribbed bottom folded it in half and sewed it back on to the shortened shirt. This helped keep the bottom from being too loose and gives it a little more stretch.

The buttons on the front actually came from the side of the shirt...a weird place to have buttons. So I just cut off the fabric strip and sewed it on the front. This saved me a ton of time since I didn't have to sew new button holes! (...and I abhor sewing button holes!!!!)

Next I shorted the sleeves and re-attached the ribbed bottom portion to the sleeve so that it gave it a little puff.

At this point I was starting to feel much better about the shirt, but it still didn't feel finished. So I attached four doilies to the top to give it a little more visual interest. (I got a full bag of these fabulous babies in one of the three boxes of fabric my mom gave me the last time I visited her!)
I simply pinned them on where I wanted them and stitched them on with my machine.

I am so pleased with how it turned out!

Sunday, March 21, 2010

Spring Is Finally Here...Sort Of...


It was finally starting to feel like spring...the sun was shinning, the birds were singing, and you could actually go outside with out a jacket...it was wonderful!

And then it snowed last night! UGH!

Now, I really do love snow...

but only in December, January, or maybe even February. But come March I am sick of the cold and ready for spring!

So to celebrate the fact that it is supposed to be spring I have started pulling out a bunch of my long sleeve t-shirts, cutting them up, and turning them into spring worthy attire :-)

I have about five or six long sleeve shirts that are pretty ill fitting and boring. The sleeve are too short and the fit is too wide. Plus did I mention they are boring!

Solution....cut off the sleeves, take in the sides, and add some pretty!

Here is the first shirt I have finished....
...and a close up...
For the pretty on this shirt I cut up a white t-shirt that has lost all shape and wear-ability. I cut three thin strips. Two of which I pinned to the shirt and stitched right down the middle of them. I turned the fabric a couple different ways to give it kind of a crinkled/ruffled look. For the flower (which you can't see well at all in this pic) I put a running stitch in the top of the fabric and gathered it to make a ruffle. Then kind of rolled up the ruffle to make a rose shape sewed the ends together and sewed it on to the shirt by hand.

I also added some length to the shirt with some of the white fabric. This gives it the "layered t-shirt" effect without the bulkiness of layering.

SO EASY! ...and I LOVE easy projects! This one only took me about thirty minutes!

I AM Momma- Hear Me Roar's blog is where I first found the idea for the pretty on this shirt. She has a little more detail and a different twist to her shirt which is super cute!
Related Posts Plugin for WordPress, Blogger...